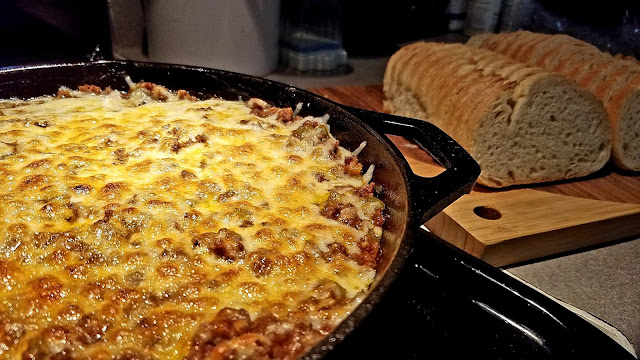
We wanted to make a video on an amazing appetizer! Chef John from food wishes made this video and we decided to recreate it! We will put Chef John's info below, fun fact he grew up in a town near our's! This dip actually came out with so much flavor and was so easy to make! It was a hit at the party and could even be a meal if you wanted.
The prep and cooking part was the easiest part, the time it took to simmer was the part that was long. You want this to simmer for about 40 Minutes on low to really soften the meat and make it just fall part when you eat it. A low slow simmer is always better than a faster higher heat simmer. You can also feel free to add or subtract any of the ingredients you see to create your own dish. We think you will really enjoy this so please below check out the rest of the blog!
Serves: 8-10
Prep Time: 20 Minutes
Cook Time: 50 Minutes
Total Time: 1 Hour 10 Minutes
Ingredients:
Makes 12 portions of Sloppy Dip:
2 pound extra lean ground beef
1 onion, diced
2 diced green bell pepper (1 cup)
4 cloves garlic, minced
2 teaspoons kosher salt, or to taste
1 teaspoon ground black pepper
3 tablespoons all-purpose flour
2 tablespoons brown sugar
cayenne to taste
1 cup ketchup
2 cups chicken broth or water
1 tablespoon Dijon mustard
1 teaspoon Worcestershire sauce
1 cup shredded cheddar cheese, divided
Directions:
In a deep pot start with your ground beef.
Add Chopped Onions, Peppers, Garlic, Salt, Pepper, Flour, Brow Sugar, and Cayenne Pepper
Mix all these dry ingredients over medium high heat and let cook. Should take about 10-15 minutes
Once the meat is fully brown add your wet ingredients, Ketchup, Chicken Broth, Dijon Mustard, and Worcestershire Sauce.
Turn down the stove to low and let simmer for about 40 minutes.
Stir every so often to mix up the dip and move around the flavor.
Once it is to a thickness you want, remove and put in a cast iron skillet. (Or oven safe pan)
Sprinkle 1/2 Cup of shredded Cheddar Cheese on top and then mix into the dip.
Sprinkle the rest of the cheese on top making a light coat.
Turn your oven to broil and let cook just a few minutes to melt the cheese. It will have a nice golden brown crust to it.
Here it is!
Chef really enjoyed making this and the team loved eating it. Mixing and making this dish was so simple and although it takes some time to let simmer it was so worth it. Plus this is one of those apps nobody would expect to see coming! You will shock all your guest at the party on this one! Make sure to see the video below to see how Chef made this and follow along!
Thank you all again for joining us. We have put out some fun appetizers but this one really was awesome! Plus we are big fans of Chef John so it was really cool recreating one of his dishes. Be sure to check out other video's you find interesting on our site we think you will enjoy those too!
Thank you again for spending time with us.
Remember cooking should be FUN, have FUN doing it!
The Cooking Corner
~Blog Team
Chef John's Info:
YouTube
https://www.youtube.com/user/foodwishes
Blog:
https://foodwishes.blogspot.com/

